A fellow homeschool mom on the FB boards was sad to see the Book Projects to Take Home supplement is out of print. So this post is for you and me for that panicked moment when I forget all these great ideas! I'm really sad to see the book projects go as we have had lots of fun with them, tho sometimes we have made up our own because the kids thought the options were a bit boring... On that note I have compiled a list of projects we have done, created or those that are simmering in my brain to help you get some ideas on what to do the 4th week of DITHOR. (Drawn Into The Heart Of Reading).
Make a diorama of a scene in the book.
Make a video of a skit you created off the book.
Build a deck of go fish cards with main characters, moods, and scenes.
Make a commercial and record it on your digital camera.
Make a flipbook of one of the scenes. (for the cartooner child)
Make puppets on popsicle sticks of all the main characters and label the backs with their character traits.
Make a game of concentration that tells the story.
Design a movie layout board for the opening shots, a middle scene and the closing (with credits).
Mock up the story as if it was a food package (fruit roll ups, cereal, chips bag, etc.)
Paint a picture of the mood of the story. (This can be a landscape or scene without people for a bigger challenge). Write up a description for the painting as if it was placed in an art gallery.
Biography: Create a autobiography scrapbook of your life (which can be added to each year), or the life of a family member (aka grandpa, grandma).
Biography: Interview the main character and write up a newspaper article (for your highly imaginative journalistic child). Or interview a interesting person and use it for Non-fiction.
Sculpt the main character.
Make a poster as if it will be a movie, or for Non fiction make an Educational poster for your homeschool classroom.
Make a patchwork pillow by choosing fabric from a craft store that expresses the moods, scenes and characters in the book. Crafting challenged option: a no sew fleece blanket instead.
Get a white pillow case and using fabric markers to decorate the pillow with words from the book that describe the 2 main characters one on each side of the pillow case. Or use the protagonist and antagonist. Decorate appropriately and don't forget to put a piece of cardboard inside when drawing so it doesn't bleed through.
Fill a box with things that remind you of the book. Write tags for each one as to why you picked it. Then tell the story using the props you picked.
Make a collage of magazine pictures that remind you of the story, on the back explain your choices.
Mystery/Suspense: Make a "clue" style game out of your story, use air dry modeling clay to create pieces.
Bake a cake, and decorate it as if it is the main characters birthday. (Then Eat!)
I hope that helps give you some ideas of what you can do for fun, when DITHOR says to do a book project to take home. Please post any other ideas or things you have done in the comments so this can be a great resource for others too!
Wednesday, July 24, 2013


Monday, July 15, 2013
Looking Forward to a New Year

I really like it when she jumps. Jumping is when she appears stalled on a skill but in reality her brain is actually working away behind the scenes. One day she is unable and the next she is able, and she stays able 90% of the time. I have noticed she jumps instead of growing bit by bit. She often appears to stall out completely but if we persist in our pursuit of her best, she will suddenly jump to the next level. I'm hoping to see some jumping this year.
 I thought I'd bring out some of the things we will be doing differently than just the "as written" curriculum. One I'm enraptures over the Logic Of English and I confess I want to do it with my children to learn alongside them as we go. I recall Mrs. Simmons she despaired of ever teaching me proper grammar and I couldn't tell a adverb from an adjective when I hit college. If it hadn't been for my so awesome roommate I wonder if I would have ever made deans list that last year. So I bit the bullet and paid out the big bucks for the Logic Of English. I went with the PDF version and discovered I need 2 sets of phonics cards... But I think I'll have my kids make their own as I'm out of money for school books atm. I'm looking forward to learning all those rules I just read through by heart this year.

 As I was unpacking I got so excited to see this book. It looks soooooo yummy! I have yet to sit down and devour it but I can't wait. One of my favorite things to do is Really LOOK at pictures. I call it listening to pictures.
I remember about 4 years ago going to a museum with my sister and her family. My nephew was kind of bored. I could tell he was exercising his good behavior muscles. I drew him aside and made him "listen" to the painting I was standing in front of. I can recall it vividly it was a painting of a tavern, there were card players, serving wenches, a baby in a basket crying, a troubadour playing, a spilled jug of beer. It was a loud painting. As I made him look really look and imagine the sounds, the place, the smells, he got so excited he dragged me from painting to painting to listen to them with me. We got so caught up in reading the paintings my sister had to backtrack to find us. I hope to instill that kind of love of art in my children this next year.
On another note Little Miss Sunshine has started a blog. I found this Kidblog site (I can lock down real tight if I need to.) I find it so funny if I asked her to write a paragraph a day she would be griping about all the work, but she pestered me daily to blog. Ha ha ha ha Check it out. :-) and please forgive the spelling and grammar.
Friday, June 28, 2013
CTC Unit 33 Watercolor Tutorial
Ok I've been Promising and Promising to get this last tutorial up. Can you tell I have trouble finishing things? I actually edited these photos on the airplane on May 18! I had high hopes of getting this up ASAP but alas my life got majorly in the way. I thought I could do it while at my parents house in early June but you see there was this large stack O' wood that was just dying to be split and I couldn't resist splitting it.

I love how this painting uses orange peels.
DAY 2

Here is what our supplies looked like, you will also need a sea sponge for day 3.

I have enhanced my stonewall line in photoshop.
don't make your dark like this make it light and fluffy. I made mine bumpy,
because stone walls are not usually perfectly straight.
don't make your dark like this make it light and fluffy. I made mine bumpy,
because stone walls are not usually perfectly straight.

Wet the paper.

Blot the paper.

Paint an even blue sky. Note how I'm using the side of my brush to follow the stone wall edge.

Ahhh I like that.

Mixing up some grey. I used just a tiny dab of black.
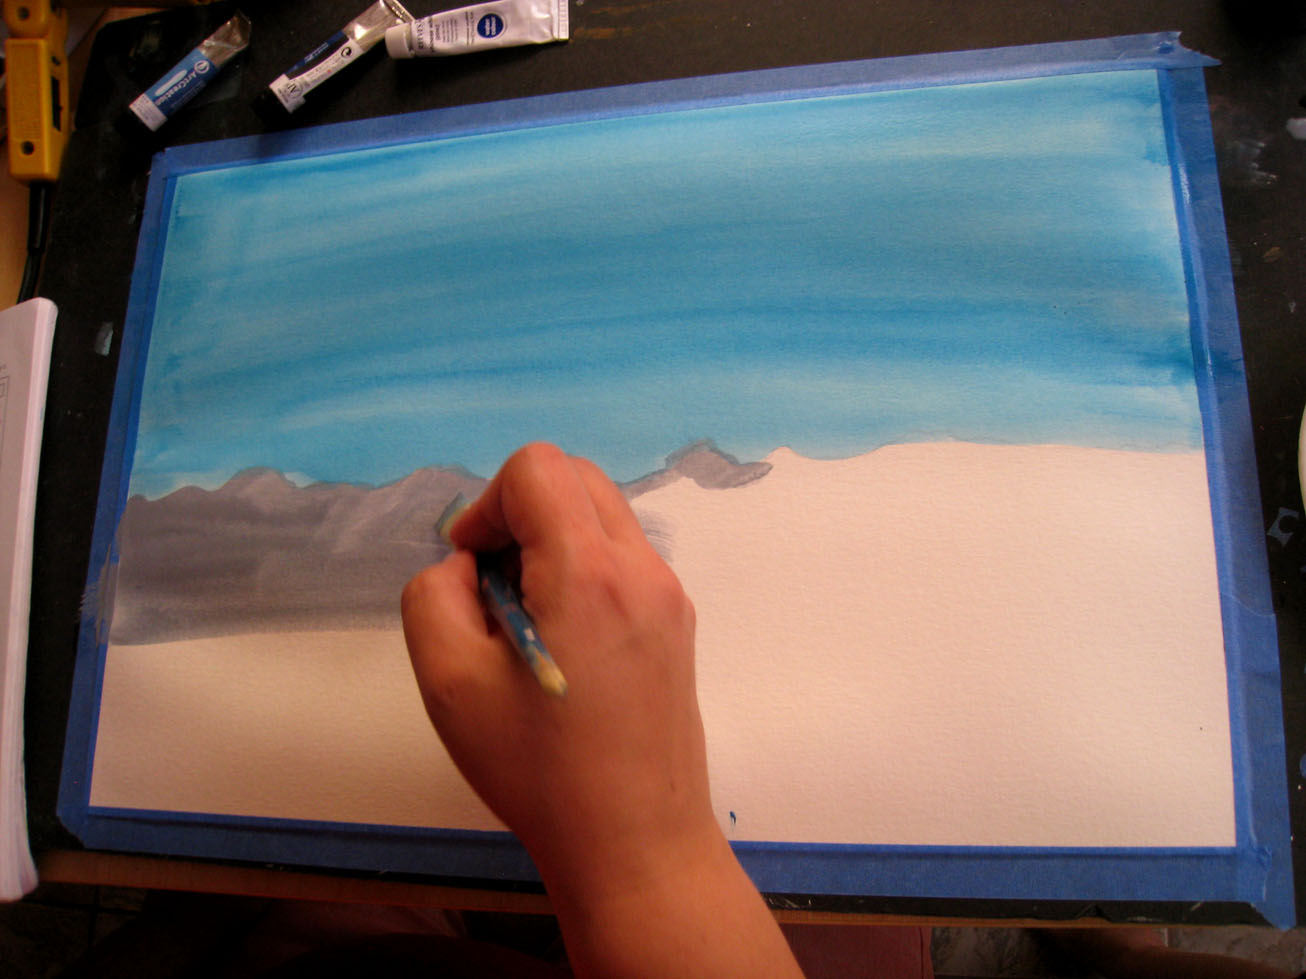
Fill the grey in the wall.

I worked my way up from the bottom with a spring green.
Set your painting aside to dry in a safe place.
DAY 3

Add a tree

Don't forget to add details in to the limbs.

Sponge on leaves I used a light green and then added a dark green over the top.

Here I'm mixing up several shades of brown, orange, and grey.

Rip or cut out a small stone shape out of the orange peel. Work carefully around the tree and you don't want to overlap the trunk with stones.

I did a bunch of the same color by painting the piece of orange peel
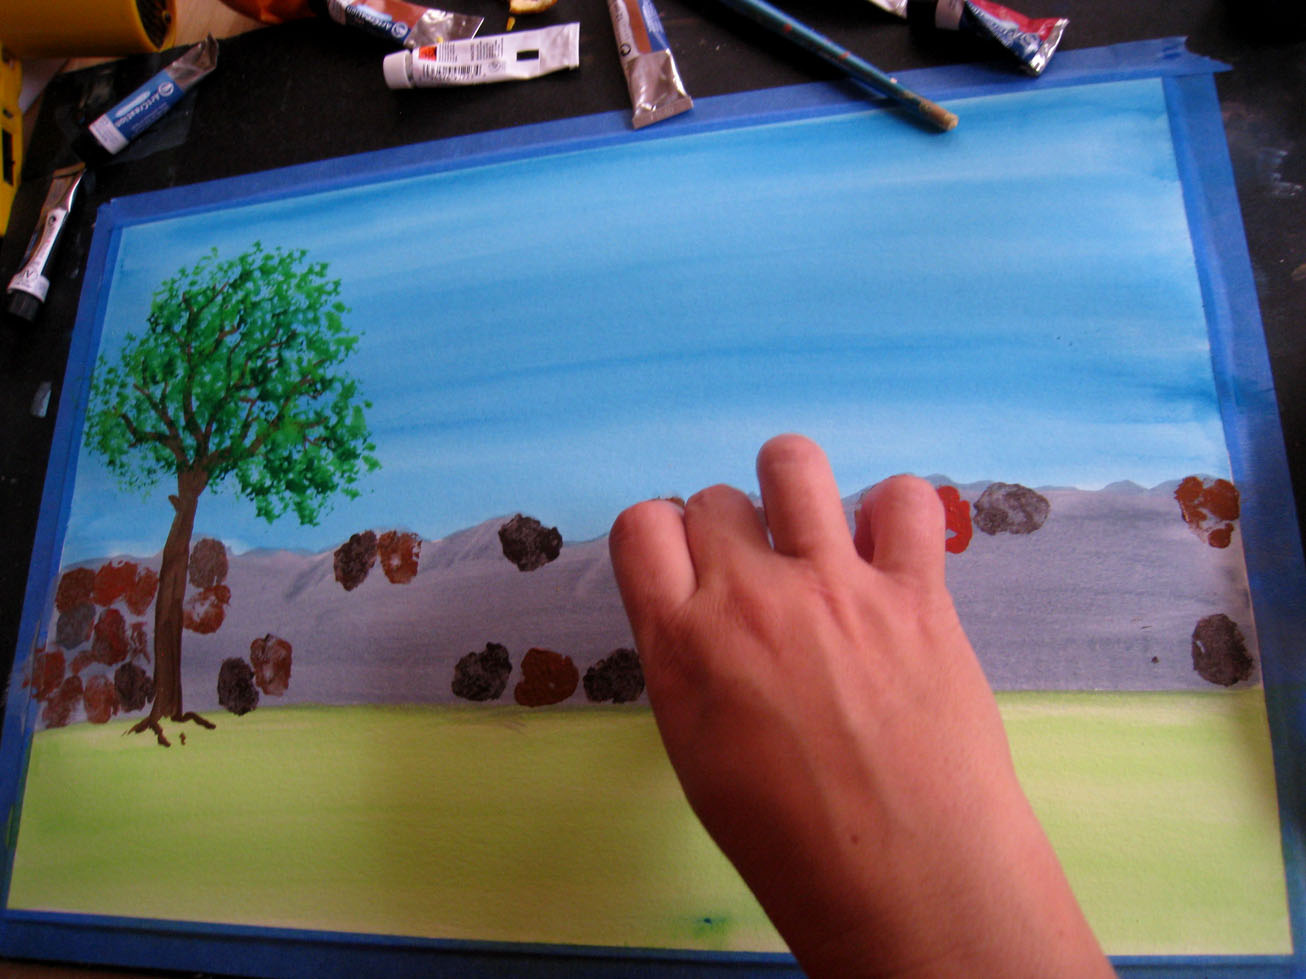
I kept adding in stones in a semi random pattern.

Experiment, I would add grey to an orange, Some times the leftover paint would create a new color on the orange peel when I would paint it with grey or brown. let this happen it helps your painting feel more realistic.

of course I dropped my peel! Right on the light green Grrrrrr... Well I can fix that just wait and see.

Almost done just a few more stones.

Oh look we need to paint grass around the wall I know just where to start!
That will get rid of my mistake.
That will get rid of my mistake.

Ahh all done.
Thursday, May 23, 2013
CTC Unit 32 Watercolor Tutorial
Ok imagine my surprize when I realized this was NOT our last painting. I was happy but since we were in a rush we did not wait for Sweet Potato.
Day 2


Tape down your painting

Wet your paper.

Blot as needed

Yellow and white only a smidge of yellow is needed.

Blend the colors

Add water to make a wash.

Don't forget Start AT the Bottom!

Angle where your table meets the wall.

take your brown and add water to it.

Blend it

Dab a little bit at a time till it it is a richer light yellow

Then paint up to the top. Keep your painting as flat as possible.

Here goes Little Miss Sunshine.

She is dipping... will she remember!

No she started at her wall line! Then she remembered and moved to the bottom.

Now what do you do when you forget to blot your paper after wetting it...

You have to blot up the color when it bleeds over your "Wall Line." I stopped photographing her here because she needed help...
Day 3

Now draw your blueberries. I have enhanced these photos to show you my lines. Draw lightly. Don't forget details like stems and edges.

I decided to be very Georgia O'Keeffe and Draw BIG!

I took plenty of time with my sketch. I looked at blueberries as well I never think I ever realized how much detail these little berries have.

Ok just one more finishing touch.

Now I mixed up some gray. Himm too dark.

Added some white, ok that is better...

Mixed in that tiny smirch of blue but it wasn't enough.

So in goes another dot of blue.

Ahh a very blueberry blue...

It says to wet down the berries again. I did so but individually since its soooooo dry here I was sure I would end up with dry paper by the time I reached the last berry.

I painted in the first berry. Don't forget to think about light where is the light where are the shadows.

That first berry was very flat.

I added a bit more water to my paint, to let it meld naturally with the water on the berry. It gave them a almost ripe look when the yellow under painting peeped through.

Keep on painting in the berries.

I decided to paint in the details first.

Like that, the paint is very opaque and it will be hard to see your pencil marks under it.

Here I am thinking about light and dark side of the fruit. I even left a highlight to help me know where the light is.

Another view.

Ok first layer is almost done.

Now add in some red, I chose the scarlet.

Mix it up.


I wanted my berries to look like they were ripening so I used a small brush and blended in the the red/blue color along the bottoms.

Ooooo I like that :-)

Now I painted in the stem. recall how you added texture to trees and feel free to do the same here.

I added black lines on my stem to make it more realistic.

Now use watery grey to paint in a shadow.

Here i'm deviating from the instructions I added a blurry white to just where I thought the light would shine on the berry.


And I felt like the details of my berries were to washed out so I used a dark blue to add them back in.

Off she goes!

Mom gets momentarily distracted and she finished in no time.

All done good enough to eat!

She loved her berries!
Subscribe to:
Posts (Atom)