Well we have closed on the house and soon we will move in. The kids are itching to move into their new home. We started by allowing them to paint their rooms. Since we did not own the last house (the ministry did), we could only paint one accent wall. We just told the kids "NO" and lived with the drab flat (so difficult to clean) paint. I must admit to having much frustration at the flat paint in the last house. It picked up dirt and stained so easily, and I didn't have any touch up for months! Then when I did get touch up it was exterior paint, and matte or semi gloss. Yes they gave me the wrong paint multiple times. Picture me banging my head against the wall... But I digress. So with the help (aka limitations) of Dad, one picked aqua and the other picked a light orange. So for the last 4 days we have been prepping rooms and priming.
So far the girls rooms and the living room are done! woo hoo! After we did that, the kitchen just looked so drab in brown and grey... the whole house was brown and grey. I really wonder what were they thinking... if my kitchen was tan, beige, (insert blah color here) I would have lived with it, but no, the mud brown had to go. So sad they just painted and here we are redoing all that work. I discovered a few things, for example they did not remove the wallpaper before they painted the wall... *sigh* since I'm in a hurry and I do not need a "renovation" at the moment. I also am committing the "sin" of painting over wall paper. Someday I will re-do it right but for now I'll just shudder as I paint over it. I feel the need to mention one should take out the plastic drywall screw holders with needle nose pliers. Not spackle over them. I now know what treasure awaits me under the lump of un-sanded spackle. Here is a tip, if you can't get it out, take a screw driver and a hammer and push it in further into the wall, then spackle over it. TA DA! no more ugly lumps.
I think I need to rant for a few seconds, Texas what is up with no smooth walls??? Why do we have texture everywhere... is it to stop people from resting their weary bones against the walls? To stop sensory children from touching them? Maybe the drywall finishers are just lazy, in a hurry, uneducated as to how sweet a smooth wall is? Up north I watched a man quickly smooth out walls for a luxurious finish. Ok, yes it took a whole day. Yes it produced enough drywall dust to choke a rabbit. Yet the result, smooth walls, lovely to touch. You can put the bookshelf up against it without knocking off bits of the wall. I have a feeling I will yet again be skimming some walls in my future.
We have just a few more days to finish painting the rooms and then the movers (friends) will be dropping my NOT flylady moving boxes into my house. These boxes were packed for a storage space not a quick move. The boxes are full to the brim and packed tightly. I think I will need a new method of unpacking it all. I'm looking forward to being settled again.
I have to give a shout out to all my friends and family that have helped me. THANK YOU! The list is so long I'll just say "you know who you are," and we could NOT have done this without your help, housing, and sandpaper. I'll have photos soon :-)
Showing posts with label painting. Show all posts
Showing posts with label painting. Show all posts
Sunday, September 13, 2015


Thursday, August 15, 2013
Painting Big is More Than Just Pictures
I love our CTC group on FB it really gets my blogging juices flowing.
Now as a Missionary Mama living "simply" I understand tight budgets Which is why I don't use the really expensive watercolor paper, I can still have my kids paint big without a crippling cost. Please don't get me wrong I'm not being critical of you if you paint small. This post is more about me working out why I want shout from the mountain tops "Paint BIG!" I'm not saying "feel bad" if you paint small, I'm just sharing why we don't paint small. This is my personal journal and I just let you read it. :-)
So here is my personal opinion as to why children should paint Big.
First of all children have a tendency to paint and draw small. If you give a child a regular sheet of paper they typically don't fill the entire page. They tend to stick their image smack dab in the middle and leave lots of space around it. When you look at many fine artists they fill the whole canvas/paper, even if only with doodles.
When you take a large piece of watercolor paper and place it in front of a child, it is a bit daunting. They think I have to fill whole big piece of paper! Yet the project usually starts out by painting a whole entire background. Painting large involves a mix of large and fine motor skills. The child must make decisions, when do I start changing colors? How much pressure am I putting on my brush? They see short strokes don't look at all like long even strokes. If a child has a 11x14 paper making long even strokes takes concentration and some finesse. A 5x7 sheet of paper doesn't have these challenges, nor do large motor skills come into play on suchs a small surface.
I'm not against cutting down a 18 x 24 ---> 9 x 12 (to conserve resources) but let me challenge you to think outside the box for a minute. If you have good watercolor paper the front will not bleed through to the back. Yes the back is not as rough but I would rather my children painted both sides of a sheet of decent sheet of watercolor paper then paint small. Why I'm wondering in my mind why am I obsessed with painting big. I'm really really happy you are painting even if it is on 5 x 7 pieces of paper. Painting big resonates deep within my soul if I could I would shout from the mountain tops "Paint Big."
I have one child that enjoys these painting but she hates to draw. She has fine motor control issues. When she has to draw in the tiny boxes in the notebooks, it frustrates her. She tires easily. Yet she likes to paint, because painting on a large surface uses a mix of muscle groups and I think tho I'm not sure a larger portion of her brain. I know art is a emotional centered activity, but fine detail work is a logic centered activity. For me painting big means opening up and touching the emotions in art. Letting our feelings out on paper. I have kids with Trauma in their background, getting them to express feelings on paper through art or writing is sooooooo good for them. Making sure painting is NOT a Fine Motor Skill ONLY project for her smoothed the way for success. There are plenty of her paintings that did not make the blog. This is because I did not have her permission to put them up. Altho plenty did make the blog, those she was happy and satisfied with. This created a cycle of success. That success builds her interior life of self worth, not self esteem but rather how God sees us as wonderfully and beautifully made people.
Art is Art if you the artist likes it in the end, that is all that really matters.
Now how often do our children not like their projects especially the age CTC covers. They are of an age where they can see in their minds eye what they want, but execution may be much harder to achieve. If you give them a tiny piece of paper to work on and they make mistakes you will hear "It's ruined." Lets face it, on small paper, a drop of paint can be very hard to "repair or recreate" (fix it by turning it into something else), yet on a big piece of paper you have the real estate to fix it.
Part of me says when we give our children the "standard" 8 x 11 or smaller paper we are creating a mind set of normal = small. If I was given a half size piece of paper I would think this is small and not as important. They already lean toward drawing and painting small. Small paper for me says the child will think small, inside the small box not big as in "The sky is the limit." mentality. Great artists paint big... ok I know great artist also paint on the heads of pins, but you have to admit painting on a tiny head of a pin is huge idea. Big paper forces a child to think larger and big thinkers turn into visionaries and leaders.
For me this is more than large/fine motor skill issue, its is paradigm shift in their brain. Creativity should think big, and in our house that means you get the biggest paper mom can afford. I want them to have goals and aspirations in life and I want my children to paint life on as big of a canvas as God has given them. I don't think I could ever hand my kids a 5 x 7 piece of paper to paint on. It goes against this deep philosophical place in my heart that is linked to dreams, goals, and aspirations.
Part of me likes that these paintings do not fit well within our binders and notebooks because great ideas often don't fit. Fred Smith the Fedex guy was told his idea was not realistic, but who do we use when it must be there overnight? Tho if all I had was a few pieces of paper I'd rather use both sides of the paper or do fewer paintings, than cut them down, because for me that paper represents far more than an art project, it represents a mindset for life.
Now as a Missionary Mama living "simply" I understand tight budgets Which is why I don't use the really expensive watercolor paper, I can still have my kids paint big without a crippling cost. Please don't get me wrong I'm not being critical of you if you paint small. This post is more about me working out why I want shout from the mountain tops "Paint BIG!" I'm not saying "feel bad" if you paint small, I'm just sharing why we don't paint small. This is my personal journal and I just let you read it. :-)
So here is my personal opinion as to why children should paint Big.
First of all children have a tendency to paint and draw small. If you give a child a regular sheet of paper they typically don't fill the entire page. They tend to stick their image smack dab in the middle and leave lots of space around it. When you look at many fine artists they fill the whole canvas/paper, even if only with doodles.
When you take a large piece of watercolor paper and place it in front of a child, it is a bit daunting. They think I have to fill whole big piece of paper! Yet the project usually starts out by painting a whole entire background. Painting large involves a mix of large and fine motor skills. The child must make decisions, when do I start changing colors? How much pressure am I putting on my brush? They see short strokes don't look at all like long even strokes. If a child has a 11x14 paper making long even strokes takes concentration and some finesse. A 5x7 sheet of paper doesn't have these challenges, nor do large motor skills come into play on suchs a small surface.
I'm not against cutting down a 18 x 24 ---> 9 x 12 (to conserve resources) but let me challenge you to think outside the box for a minute. If you have good watercolor paper the front will not bleed through to the back. Yes the back is not as rough but I would rather my children painted both sides of a sheet of decent sheet of watercolor paper then paint small. Why I'm wondering in my mind why am I obsessed with painting big. I'm really really happy you are painting even if it is on 5 x 7 pieces of paper. Painting big resonates deep within my soul if I could I would shout from the mountain tops "Paint Big."
I have one child that enjoys these painting but she hates to draw. She has fine motor control issues. When she has to draw in the tiny boxes in the notebooks, it frustrates her. She tires easily. Yet she likes to paint, because painting on a large surface uses a mix of muscle groups and I think tho I'm not sure a larger portion of her brain. I know art is a emotional centered activity, but fine detail work is a logic centered activity. For me painting big means opening up and touching the emotions in art. Letting our feelings out on paper. I have kids with Trauma in their background, getting them to express feelings on paper through art or writing is sooooooo good for them. Making sure painting is NOT a Fine Motor Skill ONLY project for her smoothed the way for success. There are plenty of her paintings that did not make the blog. This is because I did not have her permission to put them up. Altho plenty did make the blog, those she was happy and satisfied with. This created a cycle of success. That success builds her interior life of self worth, not self esteem but rather how God sees us as wonderfully and beautifully made people.
Art is Art if you the artist likes it in the end, that is all that really matters.
Now how often do our children not like their projects especially the age CTC covers. They are of an age where they can see in their minds eye what they want, but execution may be much harder to achieve. If you give them a tiny piece of paper to work on and they make mistakes you will hear "It's ruined." Lets face it, on small paper, a drop of paint can be very hard to "repair or recreate" (fix it by turning it into something else), yet on a big piece of paper you have the real estate to fix it.
Part of me says when we give our children the "standard" 8 x 11 or smaller paper we are creating a mind set of normal = small. If I was given a half size piece of paper I would think this is small and not as important. They already lean toward drawing and painting small. Small paper for me says the child will think small, inside the small box not big as in "The sky is the limit." mentality. Great artists paint big... ok I know great artist also paint on the heads of pins, but you have to admit painting on a tiny head of a pin is huge idea. Big paper forces a child to think larger and big thinkers turn into visionaries and leaders.
For me this is more than large/fine motor skill issue, its is paradigm shift in their brain. Creativity should think big, and in our house that means you get the biggest paper mom can afford. I want them to have goals and aspirations in life and I want my children to paint life on as big of a canvas as God has given them. I don't think I could ever hand my kids a 5 x 7 piece of paper to paint on. It goes against this deep philosophical place in my heart that is linked to dreams, goals, and aspirations.
Part of me likes that these paintings do not fit well within our binders and notebooks because great ideas often don't fit. Fred Smith the Fedex guy was told his idea was not realistic, but who do we use when it must be there overnight? Tho if all I had was a few pieces of paper I'd rather use both sides of the paper or do fewer paintings, than cut them down, because for me that paper represents far more than an art project, it represents a mindset for life.
Thursday, February 14, 2013
CTC Watercolor Tutorial Unit 23
I knew their was a reason I found Macintosh apples at Sprouts this week :-)
A red hued apple comes in handy for this unit. Lighting Storms mom whisked her away right after she finished her first apple. I also found out she mainly buys Red Delicious. I always thought that name was an oxymoron but apparently they appeal to some people. I have sensory issues with pears and Red Delicious fall squarely in that category! So this painting was exciting I got so excited I broke one of my rules and painted my apple dead center. Oh no :-) Remember to break lines and keep things off center to make your painting more interesting. Don't worry I gets fixed in the end.
Day 2

My super large paint brush has gone missing but If I had it I would have used it here today.

Tape down your paper if you want a clean edged flat panting.

Brown and blue for today. Here we have enough for 2 paintings.

I mixed up my light blue add water too!

Here I'm adding a bit of water to make my paint watery.

You can do this painting horizontally or vertically.

here I'm making the boards to my wooden table.

Be sure to leave the white space in between.

keep going.

Once you have made 3 boards stop...

Paint your blue lines down carefully do your best to keep them straight.

I'm a bit wobbly too its ok it gives your painting charm.

Once you have them all down, load up on paint and paint across.
It is fine you have to stop and reload your brush.
It is fine you have to stop and reload your brush.

All done here lets see how the girls do.

taping...

Lighting Storm has her own technique. it worked perfectly fine.
She wanted to do it this way, and ya know I was cool with it.
She wanted to do it this way, and ya know I was cool with it.

I really need to get a few more bushes if we keep having guests.

Shes got a pretty small brush...

But look she did great with it!

Sweet Potato is having a "Teen Moment."

See upside down perfection! Set in a safe place to dry over night.
Day 3

See I'm following the directions and looking at my still life subject.
It was a delicious Macintosh. Yummmy!
It was a delicious Macintosh. Yummmy!

I hope you can see my sketch.

I painted the yellow it was not as watery as I made the blue. You do want it wet, just not too wet. You may need to experiment here on a scrap paper. You want your paint thick enough to cover up the brown and blue, but wet enough to merge with the green.

I looked at the apple see how I contoured the yellow? That helps make it look round and globular.
If you can try to match the apple you have on hand look for the subtle changes in color.
If you can try to match the apple you have on hand look for the subtle changes in color.

Now I added in the green and really gave my edge a nice wet paint.
They merged pretty well which gives it a natural look.
They merged pretty well which gives it a natural look.

Now for the red, the paint really melded together.

Ok I'm party way done.

Lighting Storm drew a great Red Delicious apple from memory!

Off she goes!

green...

Red...

All right fantastic!

Oh no looks like we couldn't resist that tasty mackintosh! Yum Yum!

Little Miss Sunshine is thinking...

Sweet Potato is munching on apple while painting.

Little Miss Sunshine put hers off center

Sweet Potato broke boundary lines

Now add in your shadows and don't forget to paint another apple!
Put in a safe place to dry and frame appropriately.
Clean your pallet and brushes! Wednesday, January 16, 2013
Creation To Christ Unit 19 watercolor Tutorial
Today we do a landscape of a mountain. My kids loved this project.
Yet again as you progress you think to your self will this work? Will this really look like a mountain when we are done? To help I printed off a picture of a mountain from the internet, for the kids to look at. This helped them (and me!) get an idea of what we are supposed to be doing. My kids fresh from seeing The Hobbit declared we were painting the Lonely Mountain. We did read The Hobbit as our fantasy read aloud, then they went and put on the Misty Mountain song as background music. I'm tempted to put a Red Dragon looking for dwarfs flying around it!

Day 2


Sketch your mountain and foot hills.


Notice I did not put my Mountain dead center of my paper. I don't want a symmetrical painting I want it to be interesting and have movement. So putting your focal point left or right of center actually makes it look better.

Feel free to squeeze out big blobs as we will be using plenty of paint this time.

Mix all your paint up before hand.

I have to admit I used a bit of black in my blue to make it a cooler blue for my Misty Mountain.
It's as easy as paint by numbers today!
It's as easy as paint by numbers today!

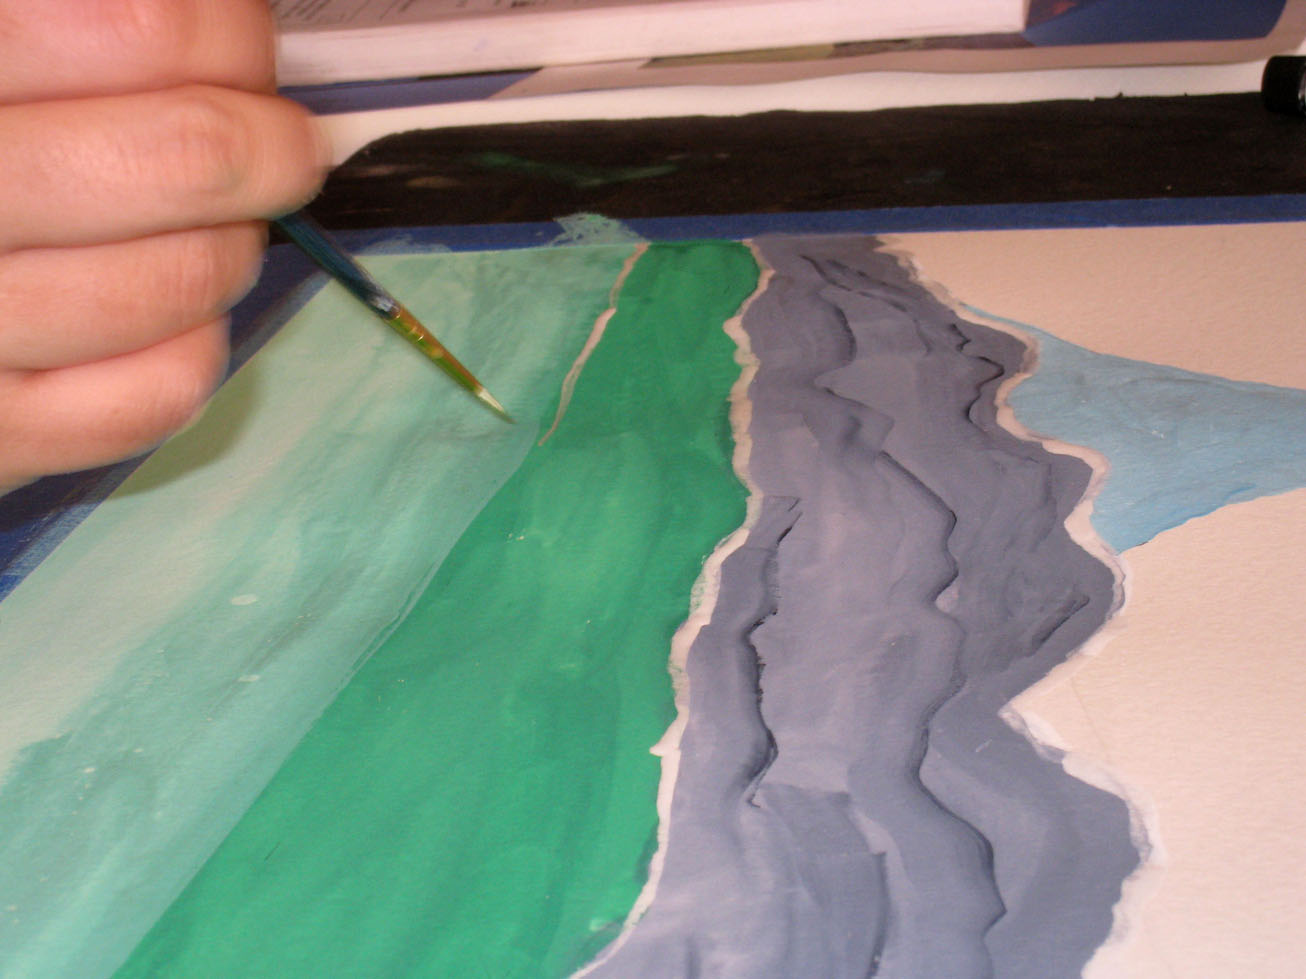
Now the gray foot hills.

Paint away.

Uh oh! some of the black paint ended up on the edge of my brush. But I loved how it made ridges in my gray I don't think I could have done that on purpose. I just let it be instead of working it into the gray.

You may need to wet your green if it has dried out.
Pulling the green into a bit of white helps control the shade.
If you want it darker pull a bit more green into it with the edge of your brush.
If you want it darker pull a bit more green into it with the edge of your brush.

Painting away!

That is done.

I needed to add more white to my green. I used a lot of the original light green paint so
I gave myself plenty of white to work with.

Now it is all mixed in!

Carefully painting the edges.

Sweet Potato has drawn and erased and redrawn her mountain... now she is happy and starts painting.

Little Miss Sunshine has the tape all stuck together!

This is fun Mom, and easy!

Ok I'm all ready to set it aside till tomorrow. Put it in a safe place!
Day 3

All we need today is small round brush.
My advice for today is take your time don't rush and enjoy the process.
My advice for today is take your time don't rush and enjoy the process.

For today you do not need big blobs of paint start small esp with the Dark Blue, and the Light Blue.
I choose a forest green since we are doing trees today.

Add about a 1/4 teaspoon of water to your white paint to make the first step.

Paint it on your edges to soften them.

Don't scrub it in just lay it down.

Take your time.
Do each layer.

Kids are keeping up!

Little Miss Sunshine didn't wait for day 3...

Now I started putting in my trees.

A few at a time

Here I'm suddenly thinking of forest elves.

its gonna have to be a big forest if it's gonna be the edges of Murkwood.

Oh my that will take forever! Maybe it's not Murkwood. maybe its the other side of the mountain.

Keep mixing the green as the instructions tell you to.

These trees I made slightly bigger since they are "closer" to me.

Trees! & more Trees!

Some over here, some over there.

Mix the paint again to get a lighter Green.

These trees I dabbed on making them even bigger, having a look at a good photo of a mountain landscape can help you know where and how to place these trees. Don't worry if they are a bit messy it's ok. This isn't meant to be a painting you will be looking at up close.

More trees marching on .
My hubby like this one too, but asked me to put in a sky I added some clouds on mine.
I'm still contemplating adding Smaug.
I'm still contemplating adding Smaug.
But here ends Carries instructions.

Little Miss Sunshine's final work of art.

Here is Sweet Potato's I really like this one.
Subscribe to:
Posts (Atom)