Creation to Christ Unit 4 Watercolor Tutorial
Day 2
I'll not list your supplies here as they are available in the Creation To Christ Guide. We are doing another wet paper technique today so I got out my Big Ol' Paint brush which I find so handy, it is optional as is the backing board and masking tape.
Optional: Tape down your paper.
Put your colors on the pallet. Don't forget it is easier to add more paint than it is to put it back in the tube. Start with a pea size amount. :-) I like to put my paint out in cool to warm or light to dark
depending on what I'm working on here I placed them light to dark.
depending on what I'm working on here I placed them light to dark.
Wet the paper.
Blot any puddles with paper towels or a rag.
I find wetting my brush before I load up my paint brush with paint helps it flow more smoothly. Also giving a quick stir on the pallet also helps get it on the brush.
This time keep going back for more paint. You want the blue sky to be more evenly colored, but remember your paper is wet so don't over work it.
Over working the paper: If you find your paper is pilling (getting little dots of paper pulp on your work surface) you are over working the paper.
I clean your brush after you have painted the blue sky.
The sky should reach halfway down the paper.
Equipment Note: Please do not leave the brush in the water,
this harms the bristles, but rather swish it around
and blot it on that paper towel you used earlier. .
The sky should reach halfway down the paper.
Equipment Note: Please do not leave the brush in the water,
this harms the bristles, but rather swish it around
and blot it on that paper towel you used earlier. .
Ok now (unlike me Oopsie!) switch to the smaller round brush! add a few drops of water to the brown paint and load your brush up.
Overlap the blue and brown at your horizon line.
For the next step pick one side of your yellow, with your dirty/brown paint,
brush load up a bit of yellow on to it.
brush load up a bit of yellow on to it.
Overlap the dirty yellow on the brown and paint down.
Once you have exhausted the dirty yellow paint,
pick up clean yellow from the opposite side of your yellow paint.
pick up clean yellow from the opposite side of your yellow paint.
Now lay down the yellow.
See here I'm pulling the green paint out towards the yellow.
Here I am letting the yellow and green mingle on my pallet,
to make the transition to green for the bottom of my painting.
to make the transition to green for the bottom of my painting.
Look here the paint is puddling. Icky I don't like that!
With a clean damp brush, I let the brush soak up the excess and swish it back n' forth.
I had to do it again here for the green. Now set your painting aside and let it dry for tomorrow.
Little Miss Sunshine says wash and dry your equipment.
Sweet Potato says pack up your paints neatly and put them away.
Day 3
Here is what you will need for today's work I don't have purple so I got out my scarlet and blue.
I only have a bit of blue and I found out I needed a wee bit more blue to get a decent purple.
A few drops of water in my paint was needed to get it to flow.
Paint in your bushes, breaking the horizon line.
Clean your brush by rinsing and blotting to get out the brown before switching to the green paint.
You can make many variations on the green as you paint.
If you add yellow you will get a lime green.
If you add yellow you will get a lime green.
I imagined it was sightly hilly so my lines are not exactly straight.
You can mix the yellow with the dark green, in a new spot on your pallet and make a medium green.
I felt the paint was a bit dry I dipped my brush in water when I felt the paint was to globby.
(I wonder is globby a word?)
(I wonder is globby a word?)
Adding dark green straight from the tube to my painting. Using lots of greens help give your painting depth and makes it more realistic. Ever go look at a field? it has lots of different colors.
Meld your colors a bit if you like.
Load up the tooth pick.
I find if you use a rolling motion with the tooth pick it lays the paint down pretty well.
After you paint with one color green layer on a lighter or darker color green.
This gives depth to the grass.
This gives depth to the grass.
Since I didn't have purple I mixed one up from red and blue.
Don't forget to clean your tooth pick I didn't want greeny-purple flowers.
Just tapping the paper gave me nice little buds for flowers I decided to go for a monkey grass kinda flower.
See how nice that looks! I was happy. Don't forget to sign your work!
Sometimes Sweet Potato decides she gonna do her own thing, here are her horizontally curved lines :-)
Mom I'm going to make it really hilly!
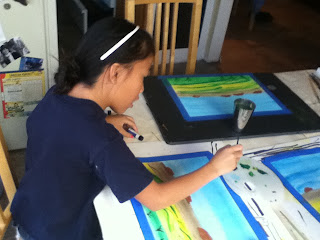
Such concentration.
Moving quickly to add in yellowish green lines.
My finished masterpiece!
Another one This is Little Miss Sunshine's
Sweet Potato decided to keep hers to her self.
Sweet Potato decided to keep hers to her self.
Don't forget to pack up your supplies, clean your brushes, and equipment.


