Day 2
Here is all the "stuff" you will need to do today and tomorrows painting.
I happen to own a sea sponge I love this sponge and I've had it since college so its seen better days. If you do not have a sponge you can use a crumpled up paper towel, or even an old rag. Little Miss Sunshine is sick today so her sister is my photographer today. Thanks Sweet Potato :-)
I discovered we did not need the "wide" paint brush.
Tape down your paper.
Squeeze out a large pea size blob of paint.
Add a drop of water, mix and load up your brush with all the paint.
Paint about 1/4 of the way down in yellow,
this really helps you to have yellow paint at the bottom of the page.
this really helps you to have yellow paint at the bottom of the page.
Dip your brush in water and keep painting, the yellow will fade as you paint down the paper.
See just a hint of color at the bottom.
Sweet Potato giving it a try.
Off she goes...
Now set aside your painting to dry in a safe place.
Day 3
This sponge is too big so I'm going to rip off just a small piece
If you don't have a sponge like this see the bottom of the blog post
for other stuff you can use to make the leaves.
If you don't have a sponge like this see the bottom of the blog post
for other stuff you can use to make the leaves.
If you don't have an orange paint tube I suggest you use yellow and scarlet.
Add a few drops of water to the brown and mix smooth.
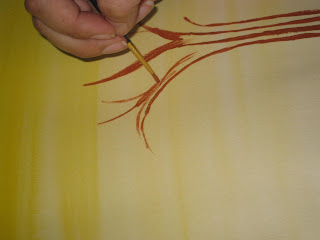
The trunk should have 4 lines thick on the bottom and thin at the top.
Here is my last trunk line.
I added branches as my fancy decided.
You can make them any way you like.
Feel free to go look at a tree before you start to see how branches grow.
Feel free to go look at a tree before you start to see how branches grow.
Here I'm putting in a branch behind the first limb.
Adding a branch on the side.
I only filled them in a little bit so they matched the trunk.
Add in smaller branches and twigs to your tree.
Twiggy
More twigs
Ahh I like that.
Now take your eye dropper.
drop water on to your trunk.
See lots of drips.
Now I'm ready for my yellow paint.
Oopsie I started with orange my bad... Dip your sponge in the yellow.
Dab dab dab.. be sure to avoid the water drops.
After you have done a layer of yellow leaves, clean off your sponge.
Mix up your yellow and red to make an orange.
Oooo I like that orange. Don't forget to clean your brush, and don't leave it in the water cup :-)
With your now clean sponge dip it in the orange.
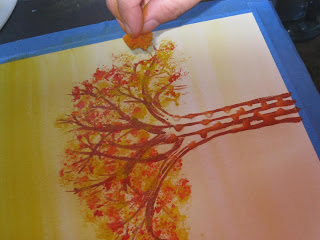
Dab dab dab over the yellow leaves.
Let the branches show through.
Now go back and dab another layer of yellow.
Carefully use a paper towel to soak up the left over water, on the trunk.
Don't forget to sign your master piece.
Set aside to dry in a safe place.
Clean up and put away your supplies.
Here are some options if you don't have a sea sponge at home
Here are some options if you don't have a sea sponge at home
A kitchen sponge (ripped), a crumpled paper towel, a cotton rag.
Use the inside part that has holes.
This delivers a lot of paint.
Here is the crumpled paper towel.
It is lighter but makes more fluttery leaves.
Here is the cotton rag. Wetting it helps to keep it from soaking up all the paint.
It delivers paint some where in between the kitchen sponge and paper towel.
Now for the orange.
Paper towel, no need to clean it for this :-)
Well that's not too bad.
Make sure you really hold it tight to keep it crumpled.
Notice how the pattern repeats a lot. Nice if you want your leaves to all look alike.
So there you go 3 more ways to make leaves.
Update: There is a 2 week break In the guides between Units 8 and 9,
so the next tutorial picks up on Unit 10 :-)


We are a little behind this week - so I was super excited to show Martin the entire tutorial this morning before he begins the very first part of the painting. He is very excited about it now!
ReplyDeleteThanks!